Adding Employees
Add/Update Employees
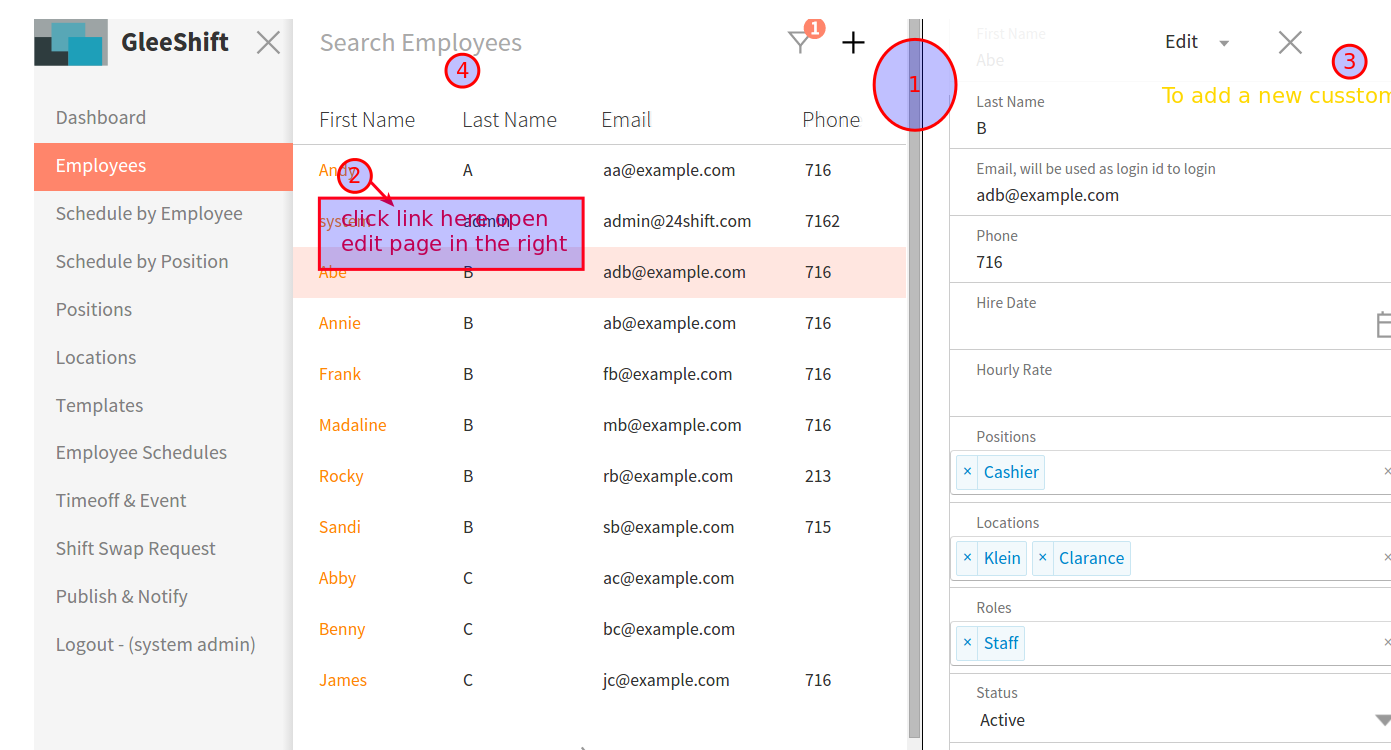
To add a employee, click on the Employees link on the left-side menu. On this page you can manage all of the Employees that are part of your schedule. You can assign position, location and roles to employee.
Click the + icon at the top right to add a new employee. There is also a option to Search Employees at the top of the page.
Click the link on each employee name to open the edit employee page. You can assign position, location and roles to this employee. To delete a position, set the Status to Delete on the edit page.
Set Employee Availability
On the employee edit page (see above), click on the caret beside the Edit and a dropdown menu will appear. Select Availiability.
The employee availability page will show as below.
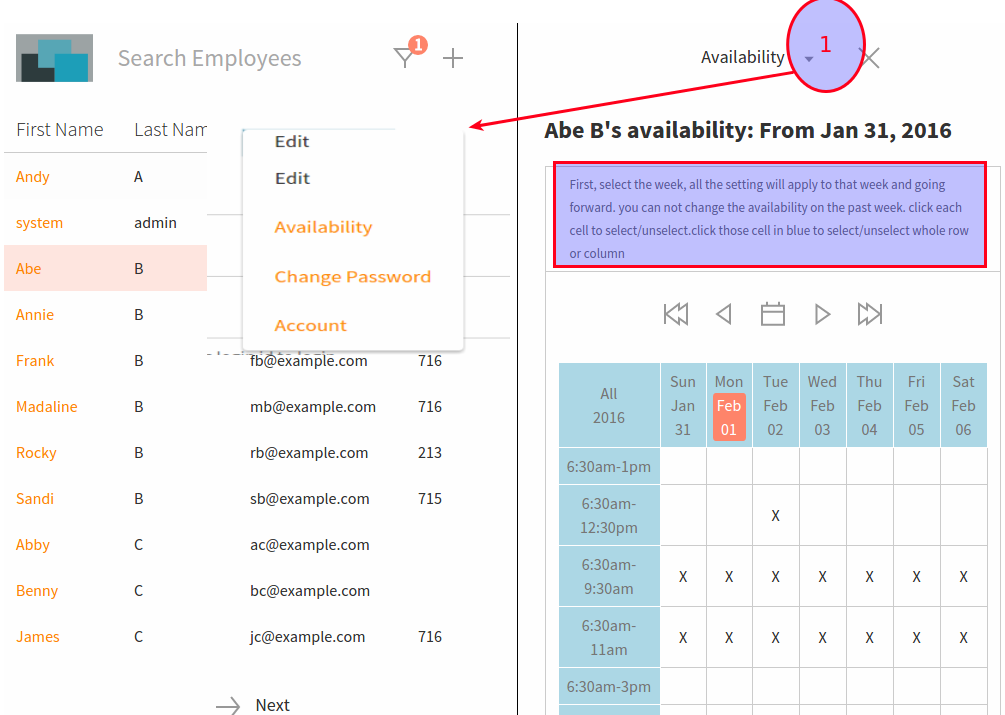
On the top of the page, there is a tool bar. Then a table; the Columns are from Sunday to Saturday. The Rows are those shift templates you have created.
In order to mark availability, click on the box that corresponds with the correct day and time. To select the entire row or column, click on the day or time shift of that column or row. To deselect, simply click the box again.
Once you are done selecting your availability for the week, click the Update at the bottom in order to save. Your availability for that week will also carry over to future weeks; in order to change that, simply move between weeks by clicking on the arrow buttons (the tool bar) at the top of the page.
You can also save your availability for future dates by using the arrow buttons.
NOTE: Employees can also change their availability themselves
Reset password
In the employee edit page (see above). click on the caret beside the Edit and a dropdown menu will appear. Select Change password.
The Employee Change password page will show. Follow the screen to change the password.
NOTE: Employees can also change their password themselves